Tuesday, August 3, 2010

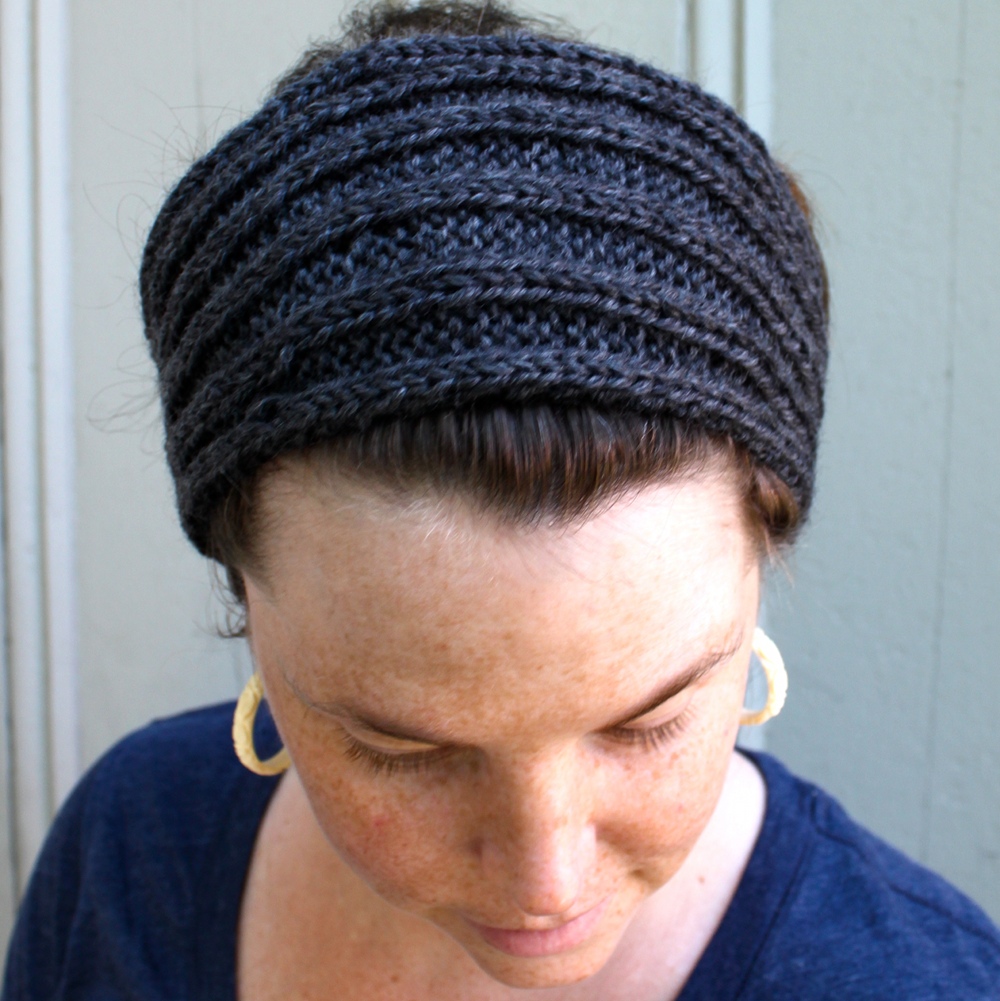
Custom Band Majorette Hat by Urban Knitfits


I'm a fan of my Band Majorette Hat- if I do say so myself.
And here's a fun one I completed during the late evening hours last week. So please excuse the photo quality as they were taken at night and not with my normal U.K. set up!


Always love making a big colorful pom pom!
The customer sent me a picture of her scarf as inspiration for the colors of the hat, and the pom pom was a fun way to reflect that color pallet. I heard back form her and she said 
"Absolutely perfect - I love love love it! Thank you so very much!!" 

So happy to have happy customers!

Monday, August 2, 2010

Mill Creek in pictures, walking around South Portland


As Part of my little Staycation- exploring Maine series, I thought I would share a very local opportunity to get out and see the city of Portland! Mill Creek is located across the Bridge from Portland- in South Portland. It's a very short drive for us and offers a fun little excursion along the path from the park to the Bug Lighthouse Park on the other end. (above- the Portland Skyline as seen from the path)


Here is a little map I borrowed from the Mill Creek website. I outlined what I think is the Path- in red. It ends with an "x" at Bug Lighthouse. The walk is very pleasant. The path is frequented by walkers, runners and bikers and offers beautiful views for everyone! See for yourself in my pictures below.


Proper Honey bees.


We haven't completed this route all the way out to the Bug Lighthouse- YET, but someday with time allowing we will. The Bug Lighthouse park is a fun expanse of grass that offers clear views of Portland and the neighboring islands.

Friday, July 30, 2010

Nifty 50 promo: Free Wrist Band + Free shipping!


Check out Urban Knitfits for more details.
Promo Ends August 1st!

Links I love, a weekly recap of my favs


Poppy Talk shares a decoupage inspiration project with fabric and furniture.
Dwellers without Decorators- wrote a darling post about a small house with big decorating ideas!
HowAboutOrange- offers a fun tutorial on canning and preserving your favorite fruity spread.
Design Sponge- Before and After Projects.
sfgirlbybay- an inspiring visual treat of summery images!

Have a great weekend!

Thursday, July 29, 2010

Puppies, Piglets and Babies


Cute video- of a jack russell puppy sleeping and dreaming away. Kinda looks like a baby polar bear swimming...


And something I've ALWAYS wanted- a tenny tiny little piglet. Watch the video here.


And in case you missed it- the blog that has been sweeping the internet- Mila's Daydreams.

Wednesday, July 28, 2010

New at Urban Knitfits: Headbands for Summer & Fall


This week I added a new line of Headbands to my knit shop- Urban Knitfits!
Above- the Cabana headband for $20.
Seen here in white and pink stripes, but custom orders are available. It wraps around twice and is such a fun vintage inspired summer accessory, perfect for helping you combat humidity hair and allowing you to achieve a Bohemian look!


A single wrap headband. Great for Summer and Fall!
Also available in custom colors of your choice.


Available in Custom colors.


I will be adding to my headband section during the rest of the summer and into the fall, so check back often!

Little Gems: forgotten photographs


The other night I found a little stack of old photographs that I collected while going through my grandparents large photograph collection... I had almost forgotten about these little gems


My Grandparents with my mom.


Kitchen- cute curtains!


My uncle and mom horsing around.


My great grandfather on my mother's side- holding one of his children....


My mom- how cute is she!?


My Maternal grandparents- LOVE this!


My mom and her great grandmother.

Tuesday, July 27, 2010

Nesting: Painted shelf project step by step


As I mentioned the other week in a nesting post.- I have a new Home project I would like to get done before the baby arrives in the fall. I decided to use the shelf seen above- that once housed art and knitting supplies, for storage for the baby. We aren't doing the traditional nursery thing and so I wanted to have at least a dresser and this shelf to carve out a little area for our new family member.


We went to Home Depot and had fun selecting a Martha Stewart Paint from her huge collection! We chose "Heavy Goose" a lovely neutral gray. **A little word on Martha Stewart Paint. Each paint card has a symbol in the top corner- a citrus, a snowflake, etc that allows you to match up your paints for an entire interior! So all the snowflake paints "go" and all the citrus symbol paints "go" together. What a fun way to help the weekend warrior coordinate their painting projects!**


The shelf in its context. As you can see the wooden shelf is really visually heavy and dark compared to the brightly painted dresser (which I got 4 free on craigslist & added the yellow knobs!). The shelf also blends in with the dark woodwork. Thus the need to paint it, to make it cheery and to clean it up a bit to store and display baby stuff. Eventually I think this shelf would be lovely in a bathroom, or some fun nook of a hallway etc. Hence our idea to paint it neutral to keep our future options open for the placement of this piece. (click on images to view them larger)


The Shelf- pre sanding.
 It really is lovely, has great lines and details (love the paneling). And the best yet I bought it from my boss for $20! (ps it's not dusty- just stained that way- hence another reason to sand and paint!)


Love the details.


The Shelf after sanding.
We used a harsher 100 grade sandpaper to knock off some of the stubborn areas, the odd paint splatter and to smooth out rough nicked edges. Then we used a finer grade of 120. We bought 150 grade sandpaper for between coats of paint.


The sanded back of the shelf.


The Husband, who has worked as a cabinet maker and furniture restorer, had the idea to use our little dyson shop vac to clean up the sanding dust. In the wood shop he worked in- they had an air gun that would blow the debris off the wooden surface and then they would follow up with a resin-type coated cloth to ensure all particles were clear from the wooden surface. Ah we can dream to have a work shop like that of our own someday! But in the mean time the dyson, a brush and a cloth helped clean the shelf in prep for the primer.


Next step- PRIMER.

We propped the shelf on top of four pint size cans of paint and laid out three trashbags as our tarp. This allowed for a tiny bit of added height and to make painting the very bottom of the legs easier and free of grass etc. The painting process took my pregnant self a good chunk of the afternoon as I wanted to cover every little dark recess and funky area with a smooth layer of paint. One coat of white primer- and the shelf already looked cleaner and brighter. I let the primer dry for 3 hours (that's two hours longer than the label suggests) before sanding the shelf with the 150 grade sandpaper. This smoothed out any rough brush strokes or unseen rough areas. Then a combo of weather, and my fatigue helped me decide to wait 24 hours before painting the first coat of our gray paint.


After 2 coats of "Heavy Goose" the shelf is complete and ready to house lord knows what for the baby...


The gray we chose really is a neutral, but it's nice to have a balance amongst all the other color we have. Plus we figure our future house wont have white walls, so this piece will pop and it provides a great background for displaying colorful objects.


And the shelf- back in its context, so much brighter and cheerier.
We are very happy with the final result and really love the color!

hmmm what to work on next!?

LinkWithin

Related Posts Plugin for WordPress, Blogger...